
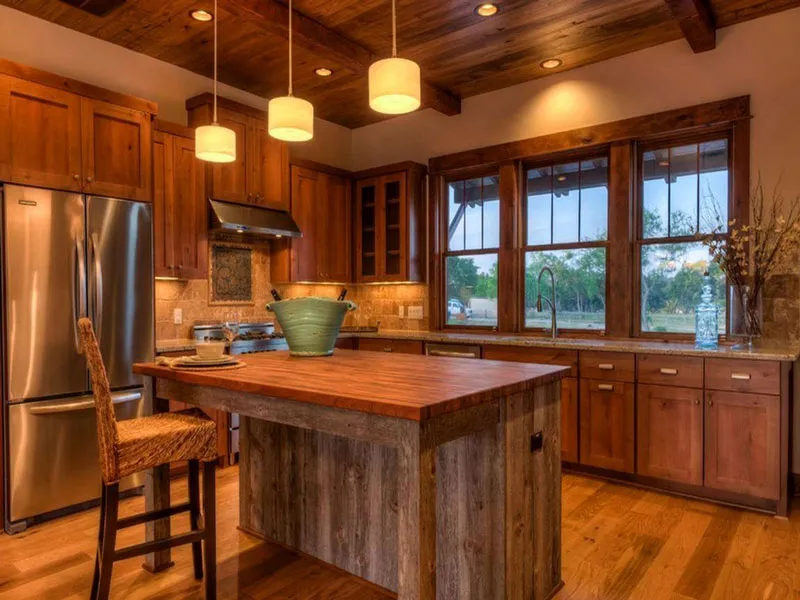
Furnishing a home with a long term goal to flip it is never an easy thing especially if you have to do it all at once because of the humongous costs. Countertops, kitchen cabinets and other furniture cost a lot these days. That is why you should reconsider your plans of doing away with a kitchen cabinet simply because you don’t like it anymore. Rather, what you should be thinking of doing is a kitchen cabinet repaint.
The cost of a kitchen cabinet painting is not the same as the cost of buying a new one. While a new kitchen cabinet may be nothing compared to an old cabinet, you can still get a few more years of value from the latter. It is for this reason that people are increasingly becoming open to the idea of spray painting kitchen cabinets.
In this post, we want to show you the steps you can take to paint your cabinet so it can become valuable again. If you get it right, you will certainly extend the shelf life of your cabinet by a few more years. So without further ado, let’s get on with it. But note that you need to arrange all your work tools and materials beforehand to speed up the job.
Prepare the workroom
Where you intend to paint the cabinet has to be prepared before you start painting. You want to remove any item there that will serve as an obstruction to your free movement from one place to the next. If the cabinet is removable, you may take it outside to open space. However, if it is stationed in the kitchen, the spray painting will have to be done there.
To this end, you will have to remove other appliances to make the work easier. Empty the cabinet, remove tables if you have to and make sure there is enough space for free movement. Another thing you should do is use a tape rosin paper to cover the floor and countertops so the paint does not stain them. If you have dozed appliances that you don’t want to remove, do well to cover them properly with the paper.
Next is to get a work table to place your work materials. The table may be an old one or a makeshift platform; it doesn’t matter.
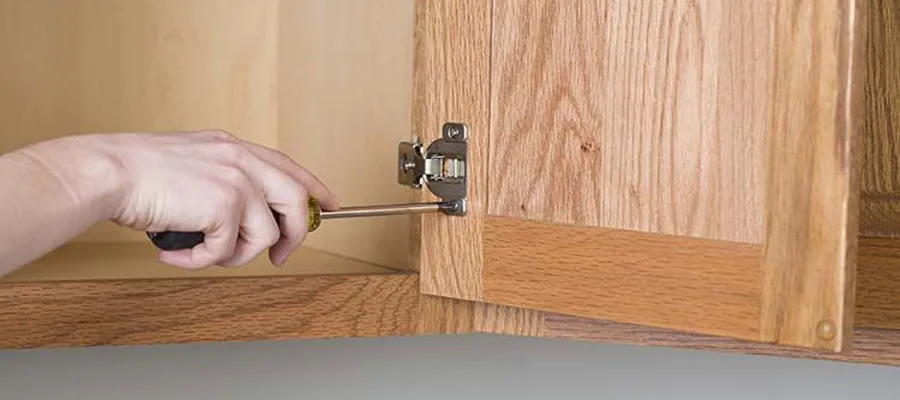
Remove drawers, shelves and doors
The next step is to dismantle the cabinet. Before you do so, mark each door with a marker so you know which is which. After marking, remove each door starting from left to right or top to bottom depending on how yours is structured. Also, remove the hinges and pulls.
 Clean the parts
Your kitchen cabinet repaint will not come out fine if the shelves and doors are dusty so you want to make sure they are dust-free. Clean them with a dry cloth then use a degreaser solution to spray them. A degreaser will ensure that your spray job comes out with a perfect finish at the end of the day. A very good degreaser you may opt for is Trisodium Phosphate (TSP) that you can buy from hardware stores.
After degreasing the parts, rinse each one thoroughly with water and leave to dry.
Prepare the cabinet boxes
Before you start your kitchen cabinet repaint, open the windows for proper ventilation and wear safety gear. Now use an abrasive pad soaked in deglosser liquid to coat the boxes. As you do so, have another dry cloth on hand to wipe off the liquid before it dries out. Ensure every part is cleaned with deglosser. This liquid will give the cabinet boxes a smooth exterior and cover any part with holes.
After the liquid dries up, use a sanding block to scuff the cabinet surface. It only requires light sanding to smoothen the surface. Then use a dry piece of cloth to remove the sanding dust.
Use a primer
Kitchen cabinet repaint requires the use of a primer so you need to have a sufficient amount available for the task depending on the size of your cabinets. There are different types of primers so use the one that works best for you. Pour your primer into a bucket and soak your roller brush with some then run the roller across the body of the boxes. For the edges, use the brush instead and make sure every part is coated.
Do not forget to coat the underside of the cabinet as well and leave no part uncoated. When you are done, wash the paint brush and roller while you wait for the primer to dry.
Sand and Fill
With the primer now dry, sand the surface of the boxes with a 220 grit paper. Any part that appears to be even due to excess primer accumulation should be sanded to make it smooth. The surface should feel like glass after sanding.
After sanding, use a latex caulk any open holes there the primer did not cover. You should consider using caulks filled in tubes with a very tiny tip so you can reach extremely tiny holes and crevices. Leave to dry and then sand again with your grit paper. With the solution dry, remove sanding dust with a dry cloth.
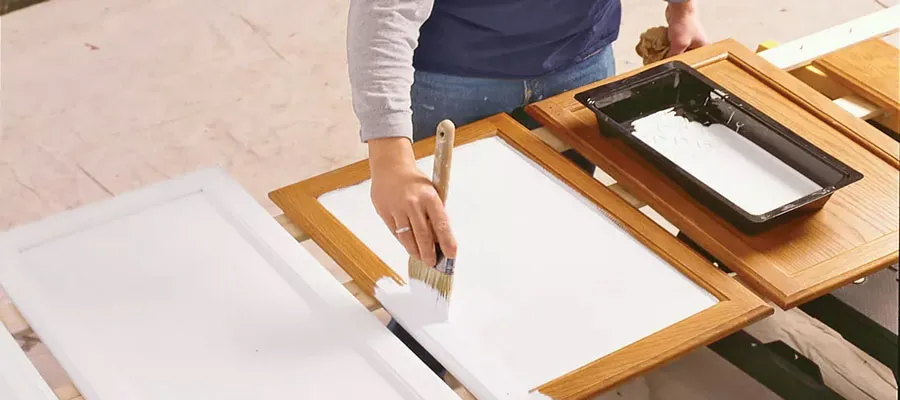
Paint the cabinet
Now is the time to do the kitchen cabinet painting proper. The colors you use are up to you though we recommend colors that match the color of your kitchen. You can go for a single or two different colors. For two colors, using a perfect mix of light color over a dark one will work but ensure you use different brushes for both.
The best paints for kitchen cabinets are special enamel paint. Pour some into the tray or bucket you are using. Dip the paint brush into the paint then start painting from one section and make progress to other sections. Pay close attention to edges and corners. You want to make sure that every part is covered with the paint. Avoid using rollers because they cannot reach those corners and edges like a brush can.
After coating the boxes the first time, wait a few minutes and apply a second quote. This will give a consistent finish with no part darker than the others.
Paint the shelves, doors and drawers
Now switch your attention to the doors, shelves and drawers. Follow the same process as you did when painting the cabinet box. For your spray painting kitchen cabinets job to be perfect, the quality of the finish must be consistent. For the doors, you can hold them by their screws so your hand does not smear the freshly painted exterior.
After the first coat, give these parts a second coat then leave them to dry.
 Couple all the parts back together
Once you are sure that they are fully dried along with the cabinet boxes, take your time to couple them together, piece by piece. Reattach the fronts and drawers. Replace the doors on their proper spots and install the knobs and hinges just as before.
Now you have a new kitchen cabinet that is not actually new but one that has been given a complete makeover.
If you consider the process we have just highlighted to be a complicated process why not give us a call to help you out. A Toronto Custom Painting, we handle kitchen cabinet repaint projects for our clients and will gladly transform your old cabinets into attractive and functional kitchen furniture. Just contact us for a free quote.
You don’t need a big budget for that kitchen cabinet repaint job your kitchen so desperately needs. Our service fees are affordable and you can expect nothing less than the best service. Our experts have over a decade worth of experience handling projects like this so rest assured that we will give you nothing but the best service that represents value for money.